Security Film Installation: Professional Techniques and DIY Guide
Why Installation Technique Defines Film Performance
Even the most advanced security window film can fail if installed incorrectly. Whether it’s a 4-mil safety layer or a 12-mil impact-resistant film, the method used to apply it directly determines how well it performs against forced entry, storms, or workplace accidents.
At BlinkSigns, our certified installers approach every project as a precision process, not a simple application. This guide shares the exact steps, tools, and environmental conditions that separate professional installation from DIY attempts, helping business owners and property managers make informed, compliant decisions.
Professional Security Film Installation Techniques
Professional Security Film Installation
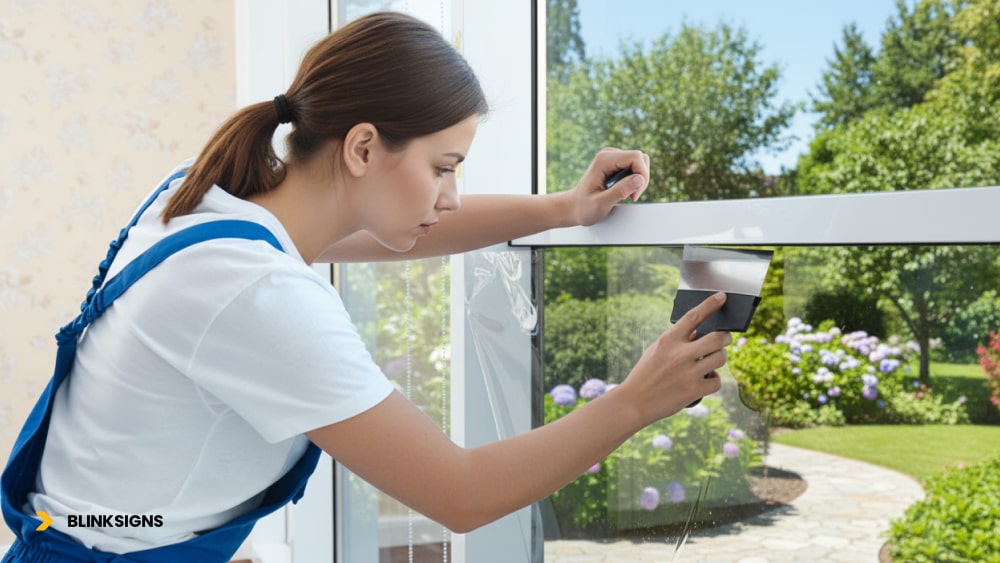
Professional installations follow a disciplined workflow emphasizing compliance, precision, and long-term film stability. Every step from glass inspection to edge anchoring is measurable in safety glazing performance.
Pre-Installation Assessment & Environment Controls
Before putting on any film, professionals look at the type of glass, how thick it is, and how likely it is to break. Annealed or tempered glass windows behave differently under pressure, so installers tailor techniques accordingly.
Environmental conditions are crucial. Ideal temperature ranges between 60 and 80°F (16 and 27°C) with low humidity to prevent condensation under the film.
Dust, wind, or direct sunlight can all cause premature adhesion or surface contamination. For that reason, BlinkSigns crews use drop cloths, air filtration fans, and protective masking to create controlled environments on-site.
Advanced Surface Preparation
Professional surface prep goes beyond “just cleaning.” The process involves:
- Scraping the glass with razor blades removes paint, stickers, or debris.
- Cleaning with ammonia-free glass cleaners or a custom distilled water + mild soap solution.
- Wiping dry using lint-free microfiber cloths followed by a tack cloth to remove static dust.
A spotless and degreased surface ensures the adhesive bonds evenly and prevents trapped particles that can cause optical haze.
Expert Application Methods
Once preparation is complete, installers move to the film application phase, where technique makes the difference.
- Slip Solution Formula: Distilled water mixed with mild baby shampoo (see table below for ratios).
- Reverse Roll Method: Film is rolled adhesive-side out for smoother alignment on large panes.
- Hinge Technique: A temporary tape “hinge” holds the top edge in position during placement.
- Squeegee Sequence: Professionals use a two-stage squeegee process, a soft pass to set alignment, and a hard-card pass to expel water and air.
- Seam Joining: Films are overlapped by 1/16” for oversized windows to maintain clarity while preventing light leaks.
- Tension Management: On thicker (8–12 mil) films, steady downward pressure avoids micro-stretching and edge curl.
When installed correctly, the film lies perfectly flat, free from “fingers,” bubbles, milky streaks, signs of poor adhesion, or trapped moisture.
Anchoring & Curing
For commercial or high-security applications, edges are sealed using 3M Impact Protection Attachment (IPA) or structural silicone. This prevents the film from detaching under impact or pressure.
Curing typically takes 5–10 days, depending on humidity. The film should not be cleaned or exposed to direct heat sources during this period.
Professional vs DIY Tool Comparison Table
| Tool Category | Professional Equipment | DIY Alternative | Purpose / Notes |
| Cutting Tools | Snap-off precision knife (Olfa L-1 or NT Cutter) | Standard utility knife | Ensures clean edge cuts; dull blades cause tearing. |
| Squeegee | 5” Pro-grade hard/soft rubber combo | Plastic shower squeegee | Hard pass for water removal, soft pass for finishing. |
| Spray Bottle / Solution | Industrial sprayer (50 psi fine mist) | Household spray bottle | Even slip distribution prevents premature adhesion. |
| Glass Prep | Razor scraper + tack cloth | Basic razor blade | Removes residue and dust before adhesion. |
| Edge Tools | Blue Max / hard card set | Credit card substitute | Edge smoothing to eliminate micro-bubbles. |
| Heat Gun | Variable-temperature heat gun | Hair dryer | Used for thermal curing or removing creases. |
| Safety Gear | Cut-resistant gloves, goggles | Regular gloves | Prevents injury during cutting or scraping. |
Slip Solution Ratios by Environment
| Ambient Temperature / Humidity | Water (ml) | Baby Shampoo (drops) | Professional Notes |
| Cool (60–68 °F / <40 % RH) | 1000 | 3–4 | Lower the soap to maintain adhesion. |
| Moderate (70–80 °F / 40–60 % RH) | 1000 | 5–6 | Ideal balance for most installations. |
| Hot / Dry (85 °F+ / <30 % RH) | 1000 | 6–7 | More slip prevents early tack-up. |
| Humid (80 °F / >70 % RH) | 1000 | 2–3 | Reduce slip; too much soap slows the cure. |
These ratios help installers control glide and bonding speed depending on the environment — a detail often overlooked in DIY attempts.
DIY Security Film Installation: Step-by-Step Guide
DIY Security Film Installation_ Step-by-Step Guide
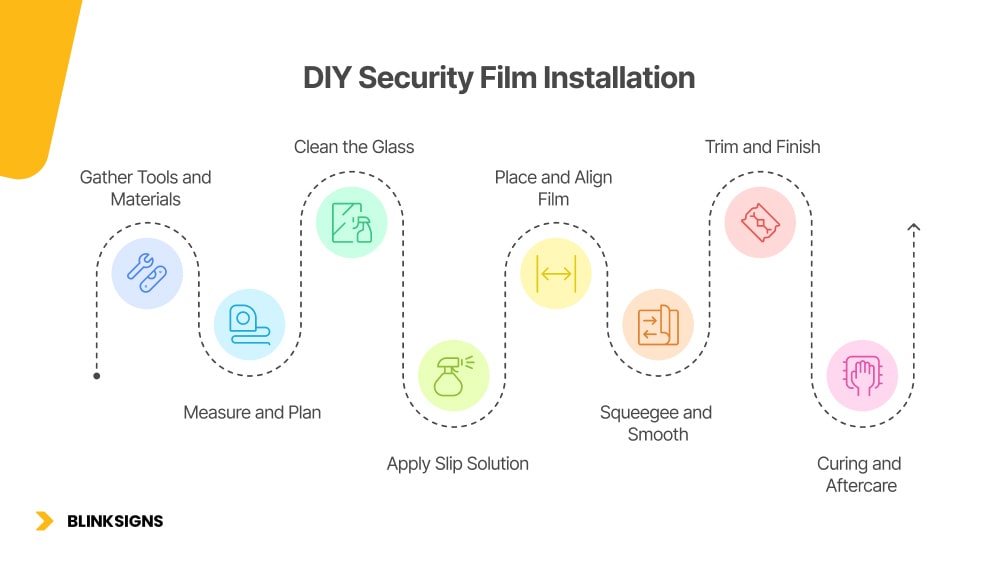
DIY installations can succeed on small windows if performed carefully under proper conditions. Below are simplified steps drawn from BlinkSigns’ professional standards.
? Planning a DIY install?
Don’t start without the complete Security Film Installation Checklist & Tool Planner — including environmental setup, tools, and compliance matrix.
[Download Free PDF]
Step 1 – Gather Tools and Materials
You’ll need:
- Pre-cut security film (ensure it matches window size + ⅛ inch margin)
- Spray bottle with slip solution (distilled water + baby shampoo)
- Microfiber cloths and ammonia-free cleaner
- Utility knife or snap-off blade
- Plastic squeegee/credit card
- Masking tape, measuring tape, and soft towels for workspace protection
Step 2 – Measure and Plan
Measure the visible glass area, adding a slight overlap (about ⅛ inch) on each edge for trimming. Label panes if multiple windows are installed to avoid confusion later.
Step 3 – Clean the Glass
Spray the window with your cleaning solution and scrape with a razor to remove paint, dust, or tape residue. Wipe completely dry using microfiber cloths — any leftover particles will appear as visible dots after installation.
Step 4 – Apply Slip Solution
Spray the glass generously with your prepared slip solution. The wetter the surface, the easier you can reposition the film before adhesion begins.
Step 5 – Place and Align the Film
Peel the liner halfway and mist the adhesive side as you go. Align the top edge of the film using masking-tape hinges, then slowly unroll downward while spraying behind it to prevent sticking.
Step 6 – Squeegee and Smooth
Use overlapping strokes from the center outward. Start with a light pressure to position, then increase it to obliterate water and air. Work toward the edges to expel all moisture pockets.
Step 7 – Trim and Finish
After squeegeeing, trim excess film using a fresh blade held at a shallow angle. Wipe edges dry and inspect for trapped bubbles or streaks. Tiny moisture pockets usually disappear within 48–72 hours.
Step 8 – Curing and Aftercare
Avoid touching or cleaning the film for at least one week. Using a heat gun to cure it naturally can cause uneven adhesion. Once cured, wash only with soft cloths and mild soap.
DIY Success Tip
Use a squeegee and slip solution to gently rewet the area if you see tiny bubbles after a day. Never use sharp objects to puncture air pockets; this creates permanent blemishes.
Professional vs DIY Installation: Choosing the Right Path
Professional vs DIY Installation
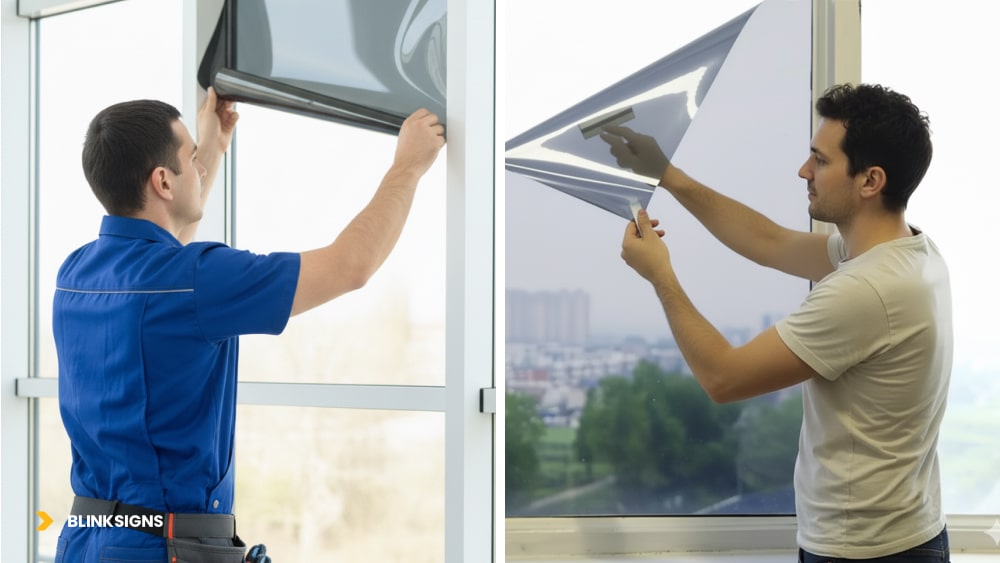
The choice between professional installation and DIY application isn’t just about cost but consistency, compliance, and long-term reliability.
BlinkSigns has documented measurable differences in film lifespan, warranty eligibility, and optical clarity between these approaches.
Example of Cost & Time Considerations
| Factor | Professional Installation | DIY Installation |
| Average Cost | $7–$15 per sq ft (includes labor, anchoring, warranty) | $2–$5 per sq ft (materials only) |
| Project Duration | 1 day per 500–800 sq ft | Variable – often 2–3 days for beginners |
| Labor Skill | Certified installers with tool kits and environmental controls | Homeowner or facility staff with basic tools |
| Hidden Costs | Minimal – warranty covers defects | Wasted film from mis-cuts and rework (10–20 % loss) |
| Expected Lifespan | 10–15 years with maintenance | 3–8 years (depending on precision and surface prep) |
Professionals finish faster and guarantee performance. DIY installation saves upfront costs but often sacrifices uniformity, especially on large panes or curved glass.
Quality and Durability Comparison
Professional crews use controlled environments and calibrated tools to ensure bubble-free adhesion and even curing.
In contrast, DIY applications risk micro-stretching, trapped debris, or uneven pressure, leading to edge lift and early haze formation.
| Performance Metric | Professional Result | Common DIY Outcome |
| Optical Clarity | 95 – 99 % VLT retention | Slight haze or banding |
| Edge Integrity | Sealed & anchored | Occasional peeling after 6–12 months |
| Bubble Presence | Minimal (<1 %) | Frequent bubbles in corners and joins |
| Warranty Eligibility | Full manufacturer coverage | Often void without a certified installer |
| Code Compliance | Meets ANSI & CPSC standards | Usually unverified / non-certified |
Compliance and Standards
Regulatory compliance determines whether a film is accepted as safety glazing under building codes.
Key Standards Referenced in Professional Installations
- ANSI Z97.1 – Impact safety rating for architectural glass.
- CPSC 16 CFR 1201 – Federal consumer protection standard for glazing materials.
- ASTM E1886 / E1996 – Wind-borne debris resistance and shock testing.
- ICC Building Codes – Local compliance framework used in permit approvals.
- LEED v4 Credits – Recognizes energy and safety enhancements from film retrofits.
DIY installations rarely document these compliance parameters.
For businesses, this lack of certification can result in failed inspections or insurance claim rejections after an incident.
Film-Specific Installation Techniques
Each film thickness and category demands its own handling method — a crucial distinction missing from most generic guides.
| Film Thickness | Primary Use Case | Installation Notes | Anchoring Need |
| 4 mil | Residential safety / UV control | Easy to apply solo; light pressure only. | Optional |
| 6–8 mil | Commercial and retail security | Two-stage squeegee passes and firm edge pressure are required. | Recommended |
| 12 mil + | Blast mitigation / severe weather zones | The installation requires two people, involves pre-cut panes, and has a gradual cure period of over 10 days. | Mandatory (IPA or structural sealant) |
Professional Tip: Heavier films store mechanical stress. Without correct tension control, corners may curl within days. Certified installers use thermal softening with heat guns to relax the film before final anchoring.
Maintenance and Long-Term Care
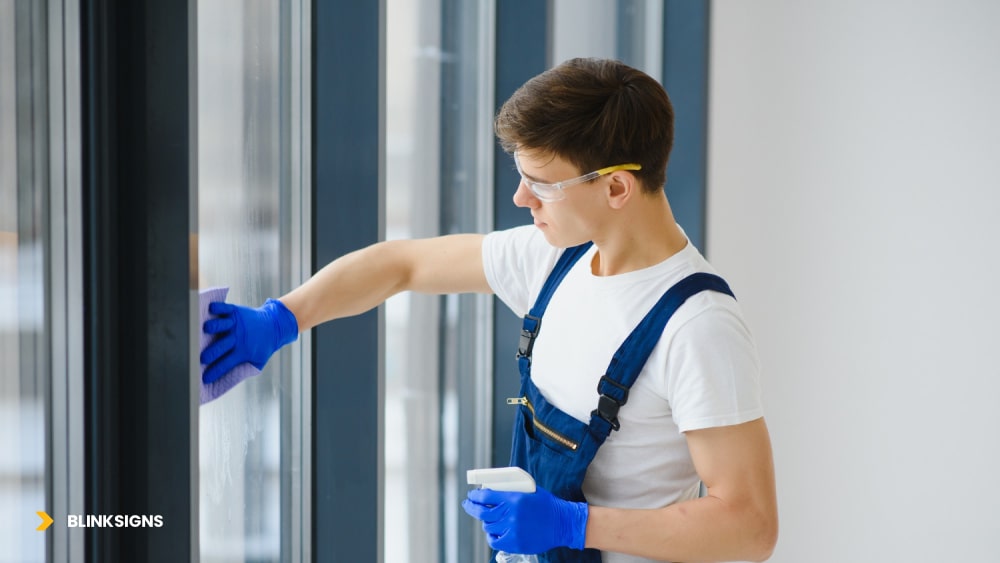
Maintenance and Long-Term Care
Even the best installation fails without maintenance. Post-install practices preserve clarity and bond strength.
Cleaning Protocols
- Wait 7 days after installation before the first clean.
- Use a soft microfiber cloth with a mix of mild soap + water.
- Avoid ammonia, alcohol, or abrasive sponges — these degrade the scratch-resistant coating.
- Always clean in linear strokes rather than circles to reduce edge stress.
Inspection Schedule
- Initial Inspection: 1 month after installation.
- Routine Check: Every 12–18 months for edge integrity and anchor seal.
- Signs of Degradation: bubbling, haze, peeling, or adhesive discoloration.
- Record findings with photos for warranty documentation.
Expected Lifespan & Replacement
| Installation Type | Average Lifespan | Primary Wear Factors |
| Professional Install | 10–15 years | UV exposure, cleaning chemicals, edge wear |
| DIY Install | 3–8 years | Surface contamination, adhesion loss, uneven pressure |
| Anchored Systems (IPA) | 15 + years | Requires annual anchor seal inspection |
Replacing film early is usually cheaper than waiting for full delamination, which often requires complete glass re-prep.
Example of Cost Breakdown and ROI Overview
| Cost Component | Professional Range | DIY Range | Notes |
| Film Material (8 mil avg) | $3 – $5 / sq ft | $3 – $5 / sq ft | Same film source; difference is labor & warranty. |
| Labor | $4 – $10 / sq ft | – | Includes surface prep + anchoring + QA. |
| Tools / Supplies | Included in service | $50 – $120 one-time kit | Knives, squeegees, spray bottles, and cloths. |
| Total Initial Cost (200 sq ft) | $1,400 – $2,800 | $600 – $1,000 | DIY appears cheaper but has rework risk. |
| Warranty Value / ROI | 10-yr coverage + insurance eligibility | None or limited (30–90 days) | Compliance matters for claims. |
A well-executed professional install yields ROI through:
- Reduced energy loss (5–15 %) via solar control films.
- Lower insurance premiums for ANSI-compliant glass.
- Fewer replacement cycles over the building’s life.
Trends & Future Outlook: The Next Era of Window Film Installation
Advances in materials science, automation, and sustainability compliance are shaping the future of security film installation.
Modern facilities no longer view films as protective layers — integrating them into building automation systems (BAS), energy optimization strategies, and long-term safety frameworks.
Innovative Films & Electrochromic Integration
A growing segment of corporate and government clients is shifting toward electrochromic (smart glass) films that adjust transparency electronically. These films require specialized installation procedures involving low-voltage wiring, cleanroom handling, and proprietary adhesives.
Expert teams such as BlinkSigns have already received training in electrochromic film calibration, which guarantees flawless adhesion without disrupting control systems.
Automation & Robotic Application
Emerging markets, especially in Europe and Japan, are experimenting with robotic film applicators for uniform installations across large façades. These machines minimize air inclusion and optimize curing under consistent tension, an innovation expected to redefine installation accuracy in high-rise projects.
Sustainability & LEED Credits
Security films are now recognized under LEED v4 and Energy Star efficiency frameworks. When professionally installed, they reduce solar heat gain (SHGC) and improve daylight comfort, supporting sustainable building certification.
BlinkSigns integrates these benchmarks into every commercial assessment, aligning film projects with ESG reporting and Scope 2 emission reduction goals.
Global Regulatory Alignment
Governments and safety councils are pushing stricter impact resistance and anti-shatter glazing standards across public-facing facilities. In the U.S., the next revision of ANSI Z97.1 is expected to extend coverage to more commercial window categories, making professional installation not just a recommendation but a compliance requirement.
The BlinkSigns Installation Advantage
Certified Expertise
At BlinkSigns, installation is never treated as a one-size-fits-all service. Our technicians are manufacturer-certified by industry leaders like 3M, Madico, and XPEL, ensuring every film meets compliance for ANSI, CPSC, and ICC standards.
Compliance-Centric Process
Each project starts with a risk and glazing audit, followed by specification matching to ensure every film thickness, adhesive type, and anchor system aligns with local building codes and insurance requirements.
Enterprise-Level Consistency
From single offices to national retail chains, BlinkSigns manages multi-location rollouts with uniform compliance and aesthetic quality.
All installations include:
- Detailed inspection reports with photos
- Warranty documentation for each site
- Anchor system certifications, where applicable
- Maintenance schedule and reminders
Long-Term Partnership
We don’t disappear after installation. Clients receive periodic checkups, edge integrity testing, and performance monitoring to ensure every pane remains compliant and visually pristine for years.
FAQs
Q1. How difficult is it to install security window film yourself?
DIY installations are feasible on small windows using 4–6 mil films. Larger or thicker films require more control and precision than most homeowners can achieve without training.
Q2. What tools do I need for DIY installation?
You’ll need a utility knife, squeegee, spray bottle, mild shampoo, microfiber cloths, and masking tape. Heavier films may require a heat gun and edge sealing tools.
Q3. How long does professional installation take?
A trained team installs roughly 500–800 sq. ft daily, depending on glass accessibility and environmental conditions.
Q4. How long does security film take to cure?
Most films fully cure within 7–10 days, though thick 12-mil blast films may take up to 14 days under humid conditions.
Q5. What’s the main difference between professional and DIY results?
Professional installers ensure compliance, uniform adhesion, and a longer lifespan. DIY results may appear fine initially, but often develop bubbles or edge lift after a few months.
Q6. Can I clean newly installed film with alcohol or ammonia-based products?
No. Only mild soap and water should be used after complete curing. Alcohol and ammonia degrade the protective coating and void warranties.
Q7. Can security film be installed outside the glass?
Exterior installation is possible with UV-resistant films but requires specialized adhesives. Most commercial installations are interior-mounted for durability and aesthetics.
Q8. Does DIY installation affect warranty or insurance?
Yes. Manufacturer warranties and insurance benefits typically apply only to certified professional installations.
Q9. What temperature is best for installation?
The optimal range is 60–80°F (16–27°C) with humidity under 60%. Avoid installation during extreme heat, cold, or wind.
Q10. Is professional installation required for schools, hospitals, or government buildings?
Absolutely. Compliance with ANSI Z97.1 and CPSC 16 CFR 1201 is mandatory for public facilities — certified installation ensures acceptance during inspection.
Conclusion: Installation Quality Defines Protection Quality
The strength of any security film isn’t just in its material; it’s in how it’s installed.
Every detail affects impact performance, optical clarity, and compliance certification, from precision surface prep to the final squeegee pass.
DIY installations are suitable for small-scale residential needs, but professional installation guarantees safety, code compliance, and warranty-backed longevity essential for commercial, institutional, and multi-site environments.
At BlinkSigns, every installation balances engineering precision and aesthetic craftsmanship backed by certification, compliance, and years of field-tested expertise.
? Contact BlinkSigns today to schedule your on-site film assessment or nationwide rollout consultation.
Let’s help you build a safer, compliant, and visually consistent environment that performs as strongly as it looks.